FREE SHIPPING with orders over RM80. Details

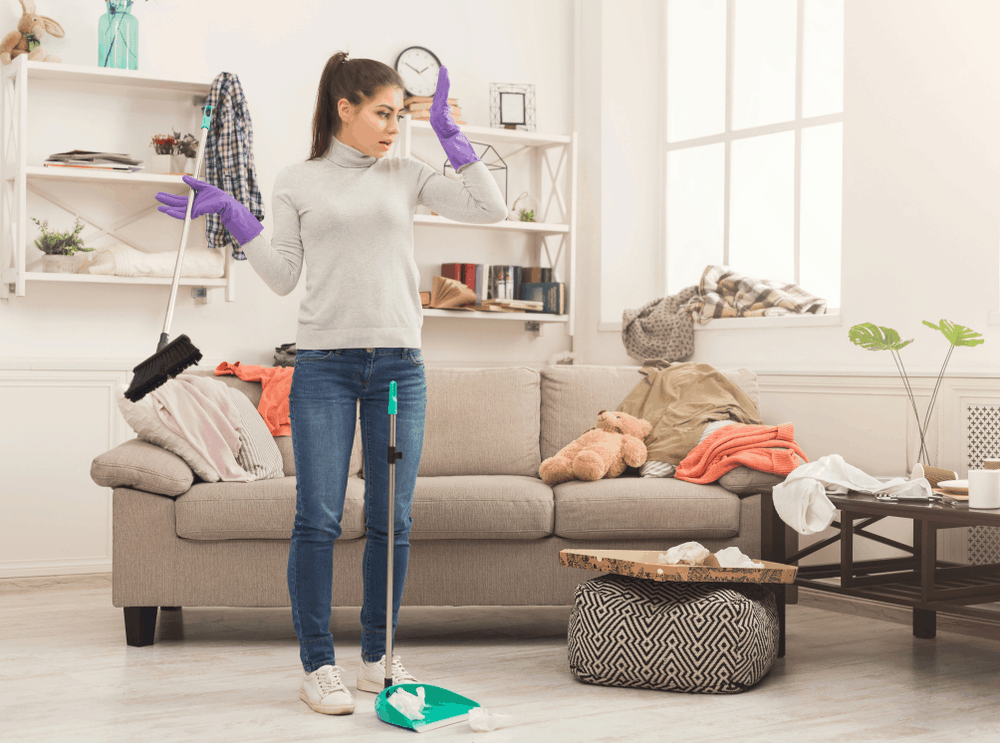
It’s reaching the end of 2019 and yes, you guessed it right! It’s that time of the year again. Time to clear all the clutters you’ve collected over the past year and give your home its very much needed once over. While cleaning is always an extremely dreaded chore, who says you can’t make it a fun-packed activity as well? How so, you may ask? Continue reading to find out!
Listed below are 23 fun tips and tricks that will help you sail through your cleaning tasks without breaking too much of a sweat!
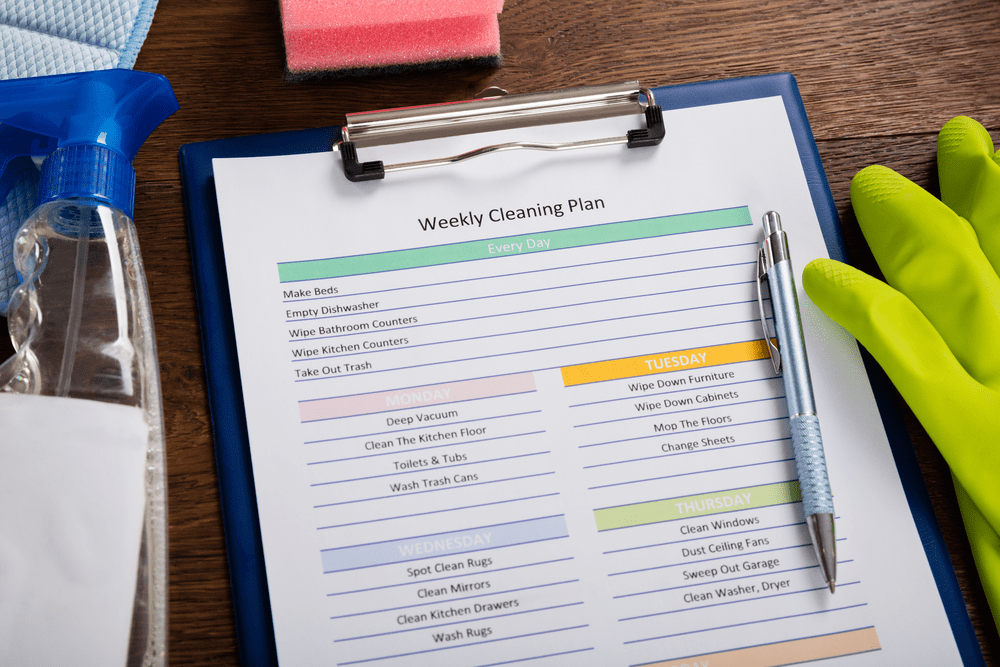
While it may be fun to fantasize about having superpowers, you can only do so much at a time. So, first things first, stop having unrealistic expectations of yourself because you will just build yourself up for disappointment. Instead, formulate a reasonable cleaning schedule that you can work with and be sure to stick to it! First, get a piece of paper and a pen and start dividing your house into separate cleaning zones such as the bathrooms, kitchen, bedrooms and garage. Next, list down the tasks needed to be done in each zone including the time allocated for each tasks and tools required for them. With a systematic timetable to navigate with, it’ll help you to stay focused and get your jobs done efficiently. You’d actually be surprised by how little time is required to complete some of these chores. For instance, given an average-sized bathroom, the time needed to clean your tiles would only be about 10 minutes. Once you’ve realized this fact, we’re sure that you would be down to clean your bathroom more frequently. While devising a schedule may sound particularly dry, check out the trick down below to see how you can make it fun!
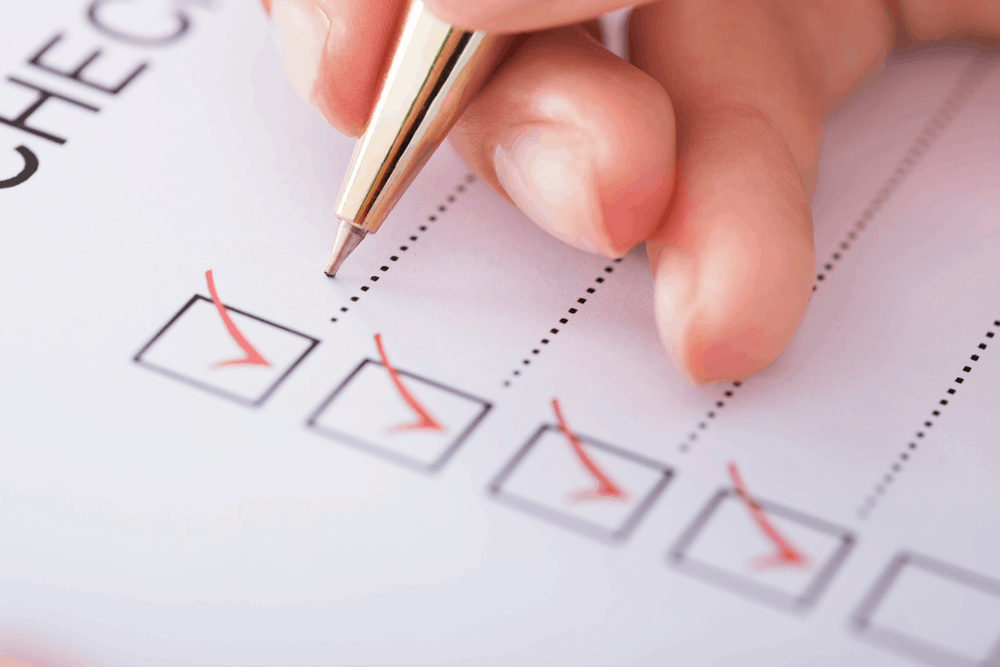
Following the roster you made earlier, you can kick the cleaning fun up a notch by creating a charming little checklist for yourself. If you’ve been accused of being a control freak, this tip would be right up your alley as you will get to have the pleasure of checking the tasks you’ve done off your list. I mean, what spells accomplishment better than ticking something off your to-do list? Nothing comes close to it. Additionally, having a checklist can also help you to keep track of your cleaning progress. If having a checklist stresses you out with the thought of having a million tasks to complete, you’ll have to learn to manage your time wisely. Let us guide you on how to do just that in the next tip!
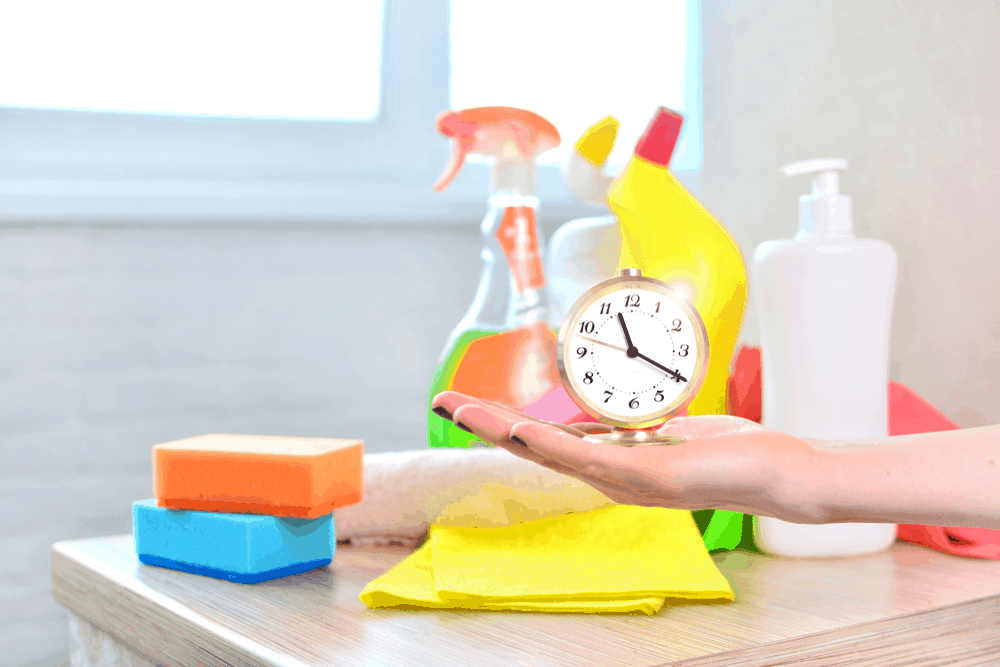
There is no time to waste when it comes to cleaning your home because we are positive that you’d want to get the job done and over with as soon as you can. Well, here’s a brilliant little hack to help you save time while you go about your chores. While it may be commonplace to have just one bucket of cleaning supplies at home, we encourage you to stock up on your cleaning products and have multiple sets available for different zones in your house. Better yet, assemble the different things you require for each zone and keep them in separate buckets. Be sure to place your buckets at accessible places so that you can reach them easily when needed. Now, you no longer have to trudge through the entire length of your home to get to your cleaning supplies because they will always be nearby no matter where you are. Another great tip would be getting yourself a smart robot vacuum that does all the work for you. Simply switch it on and let it complete its job while you tend to other cleaning tasks. Not having to manually vacuum the entire perimeter of your household should be a huge burden off your shoulders. The time and energy saved from running around your house can be channeled towards completing your tasks more efficiently.
Many cleaning newbies have done the rookie mistake of cleaning a cluttered space first and they certainly won’t be the last ones to do so. Luckily, we are here to stop you from committing this blunder that would be considered as a huge crime by the cleaning police. (If such a thing does exist!) It only makes sense to clean your space AFTER de-cluttering it because if you had done otherwise, you may end up cleaning items that you’ll eventually toss out anyway and what would that be? A complete waste of time, of course! So, it’s time to work smart seeing as you don’t have precious seconds to spare on performing redundant tasks. What about de-cluttering? Is it as hard as it’s portrayed to be? Check out Tip No. 6 to discover the truth behind de-cluttering and the ONE secret tip that makes this task a piece of cake!
Speaking of de-cluttering, all women are guilty of hoarding their make-up and skincare products, leaving their bathroom cabinet and dressing table piling higher each day with tons of products on them. Yes, these products usually cost a hefty price and it is understandable that you may be reluctant to rid yourself of them. However, if we are being honest with ourselves, at least half of these products are just lying there acting as your room’s décor more than anything else. We are sure that you can spew a list off the back of your mind of the names of your daily go-to products. Anything beyond these belong either in the trash can (if they are past their expiration dates) or should be donated to others who need them more than you do. While it may sound harsh, you’d eventually be glad to have done it because we always believe that de-cluttering is a holistic process that involves mastering the art of letting go. But what if you really can’t let go of the things you’re overly attached to? See below for a particularly helpful hack to keep your things while keeping your home tidy at the same time. It is indeed the best of both worlds.

Yes, you heard us right! All you hoarders can now rejoice but caution, this is not a long-term solution for dealing with your messes. We’d also like to put forth a disclaimer that we will not be responsible for the next time one of your nosier guests go sneaking into your secret stash out closet and discover your not-so-little secret. Despite that, this is still a very helpful tip because it is humanly impossible to get away from gathering clutter as time goes. While you may vow to not have any more clutters after your last cleaning session, it is something that will inevitably happen. So, as the saying goes, better to be prepared for a rainy day, right? Simply set aside an enclosed space like your entryway closet and mount a rack for storage of any future clutter. Any items that hold emotional attachment to you (despite not having any use for them) can also be kept here. While these may serve as good memory joggers for now, trust us, you’ll be more tempted to be rid of them the next time you come across them when you realize that they’re only taking up precious space of your home. You only must abide by a single rule to become an expert in de-cluttering. And that rule is - anything that you haven’t used in the past 9 months or so belongs in that donation basket of yours. Dissect every single room and fill your basket with any items that fit the rule. Also, it’s worth mentioning that you should always start with piles first to get the heaviest load out of your way. Now, what about your bedroom closet? How do you start with that? We’ll walk you through that later.
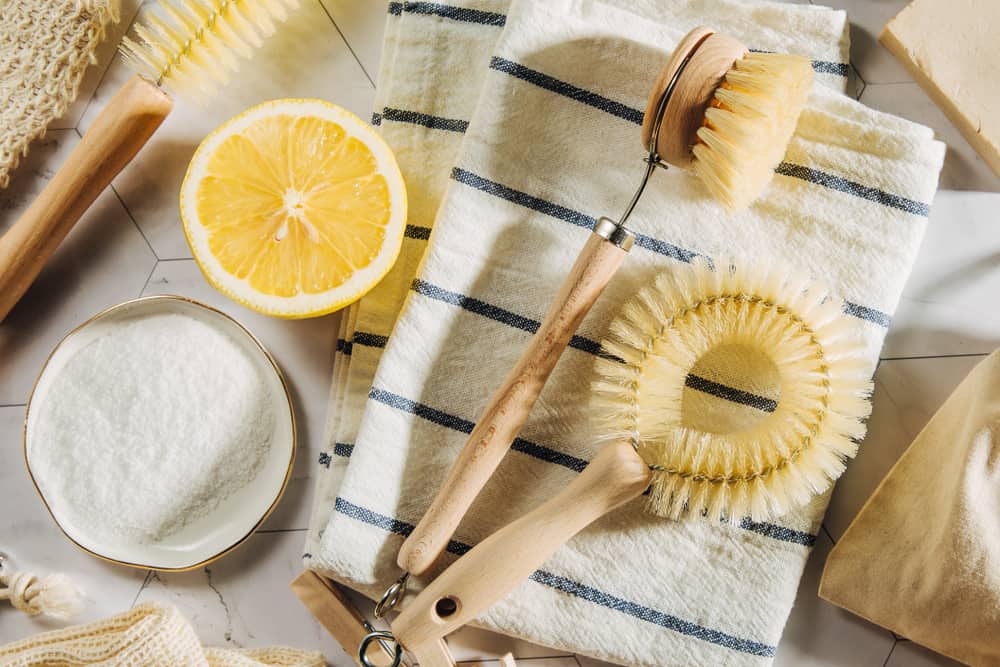
Are your home’s interiors looking duller lately? If yes, grab the few lemons lying around in your fridge to help bring back the dazzle to your home. Cut these lemons in half and rub them against any stainless surfaces you can find in your house, be it your bathroom or the kitchen. Witness the miracle of the lemon juices removing any sort of stains or rust from these surfaces. You would also benefit from the fresh, crisp scent left behind afterwards. When you are done with these lemons, do not hurry to dispose of them. They can still be used for your other cleaning tasks. Check out the next hack down below to figure out what it might be!
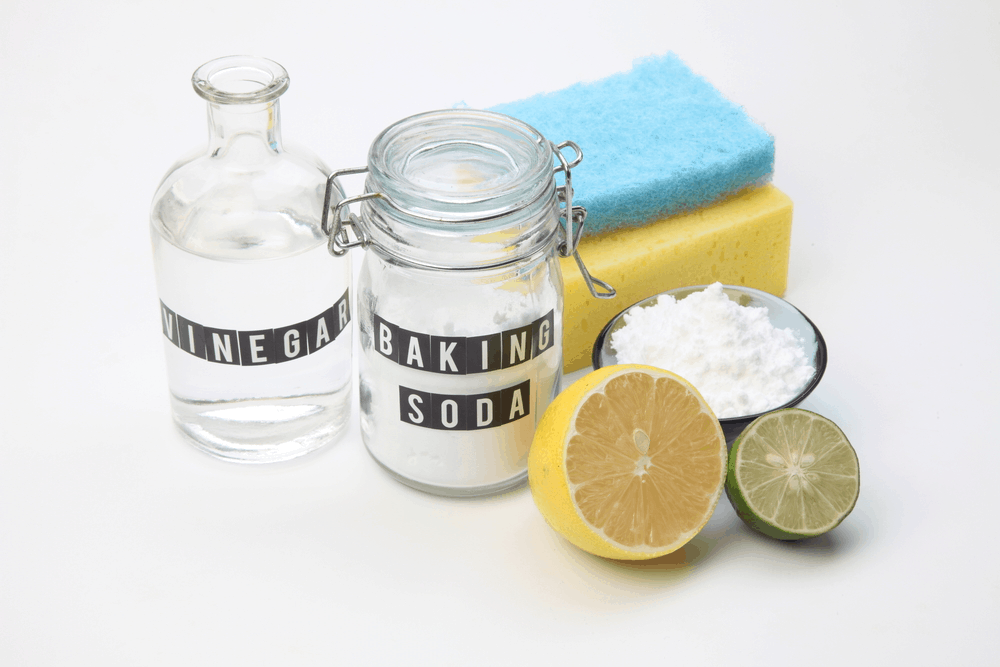
The icky task of cleaning your garbage disposal isn’t something anyone would look forward to. Nonetheless, it must be done to prevent your garbage disposal from becoming a growth media for the countless number of bacteria eagerly taking shelter within it. What if we have a way to clean your disposal system without you needing to get elbow-deep into it? Simply pour a mixture of half a cup of baking soda, a cup of vinegar with hot water and the lemons you previously used down your garbage disposal. This should do the trick in removing any nasty odor and residual grime off the insides of your garbage disposal.
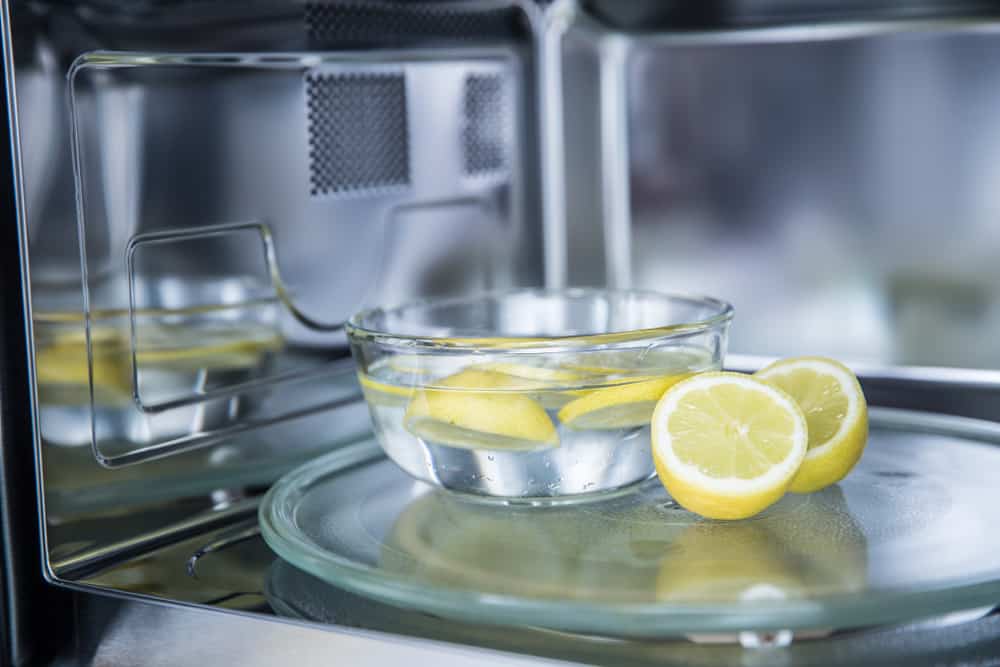
We’ve all experienced mishaps with microwaving one time or another in our lives. Ever tried heating up leftovers and have them completely cause a mess inside your microwave? Yes, we can relate all too well on that. Worry no more as we have just the trick to remove the mess effortlessly! Fill a microwavable bowl with 1-2 cups of water, 2 tablespoons of white vinegar and some lemon slices. Heat up this mixture for about 5 minutes and you’ll notice that the sticky messes are effectively softened for easy removal off the insides of your microwave. Now that your microwave is clean and ready to go, check out how it can pass along the favor and assist you in your cleaning task down below.
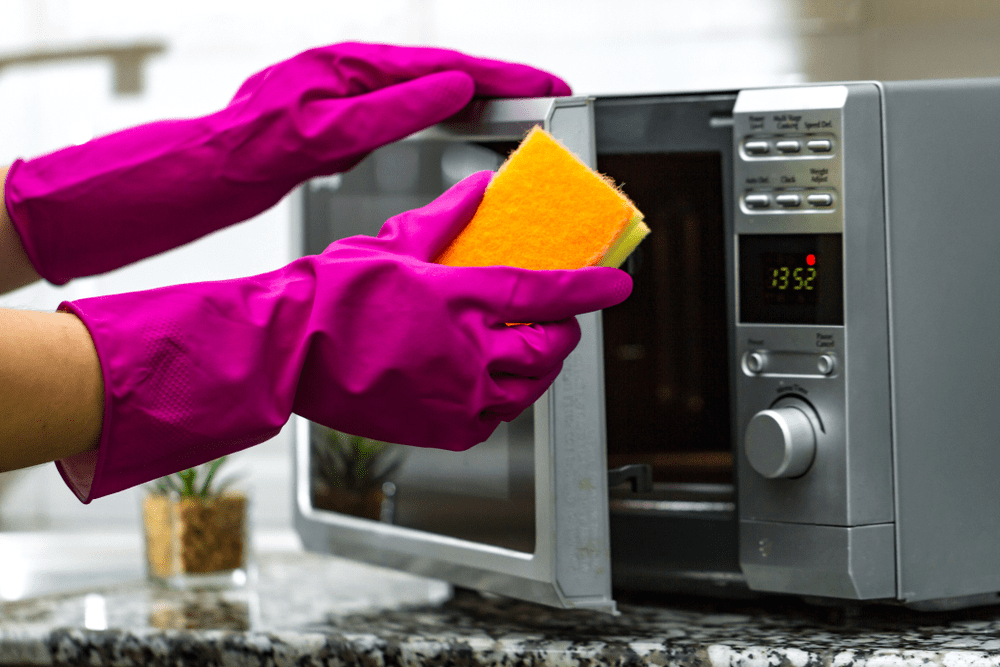
Have you been super spontaneous about starting off your cleaning session today? You must have gotten up in the morning feeling extra motivated and wanted to make the most out of your day. But, alas, you only have so much cleaning sponges available at home. Well, don’t let this small matter hinder your cleaning progress because we have a fool proof trick to handle it. Simply soak your sponge in water, set it on a microwavable plate and heat it up for 2 minutes. Just like that, your sponge is now sanitized and ready for another round of cleaning!
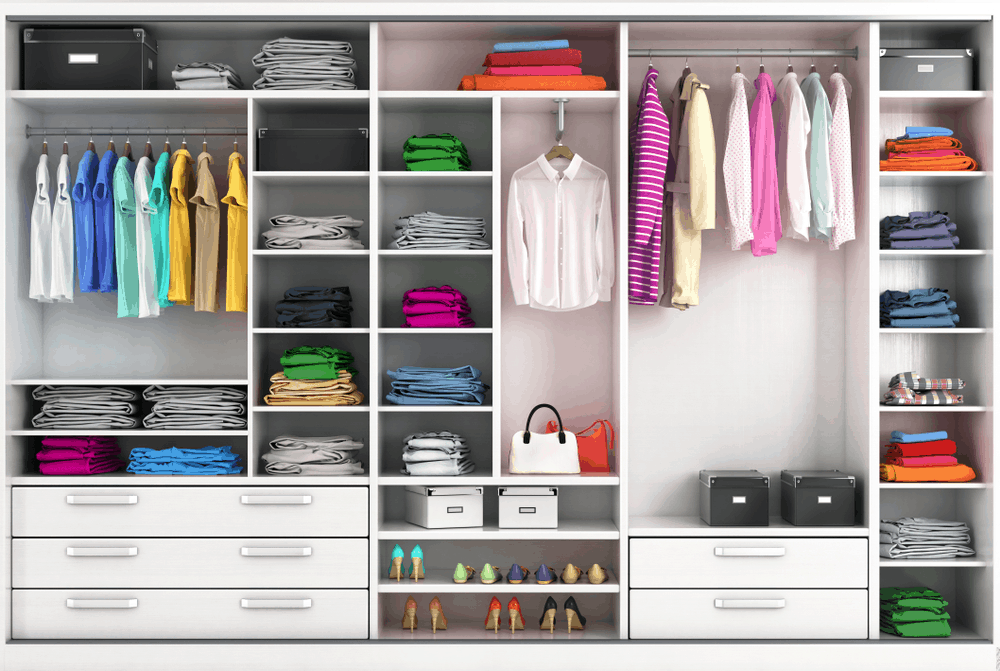
Holla to all the girls out there who need a full day (if not more) to de-clutter their closets! We’ve all been there and done that. Now, it’s time to device a more effective plan for easier de-cluttering of your bedroom closet. First, categorize your clothing into different sets of wear such as pants, t-shirts, dresses, undergarments, accessories, etc. Sift through each of these categories and again, per the rule mentioned in tip No. 6, toss anything you haven’t worn in the past 9 months into your donation pile. Next, restore all your remaining clothing items in similar categories with matching hangers to make dressing up easier and more organized the next time around. Another tip would be to keep everything you regularly wear at your eye-level and within reach. This helps you to avoid the hassle of going through your clothing and messing up your closet’s arrangement.
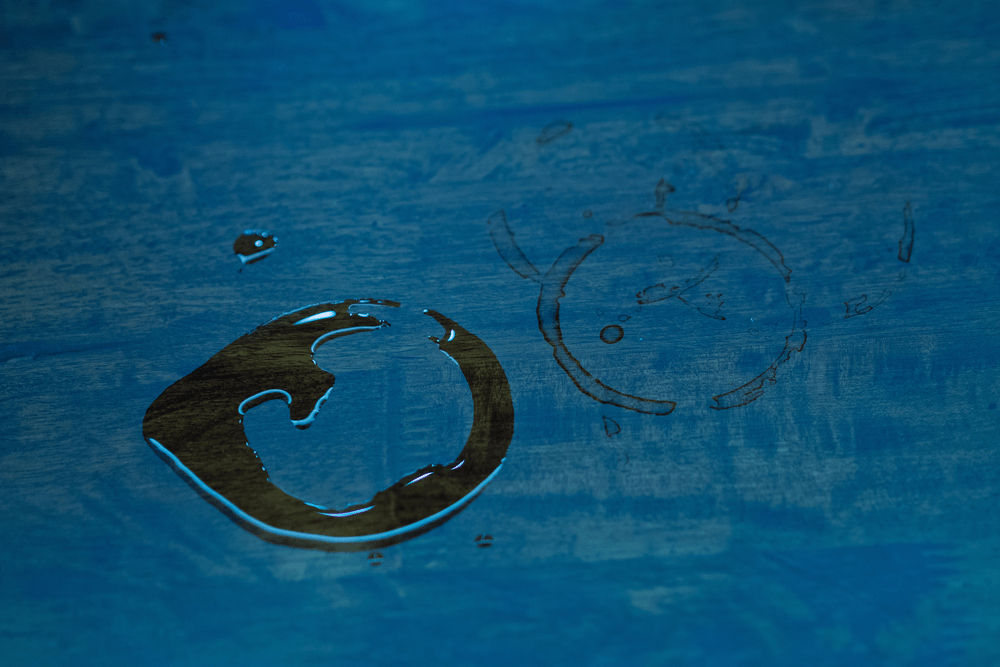
Have you ever had the misfortune of entertaining ignorant guests who just won’t use coasters and end up leaving multiple hideous water rings on your beloved wooden coffee table? Before you jump the gun and decide to donate or worse, dispose of your coffee table, there is a way to save it. Time to put your hairdryer to good use by heating up the offending spot and low and behold, the marks have disappeared as if they were never there to begin with! To restore the wood’s condition back to normal, try applying some olive oil on the affected area and your coffee table should be good as new.
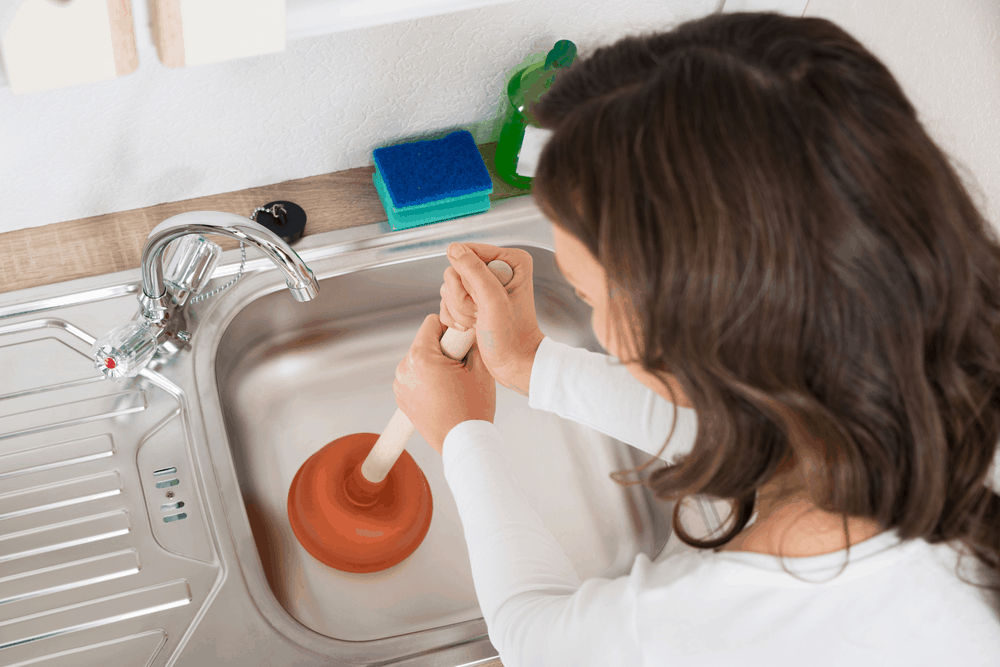
The uses of baking soda are endless, and it has been the one key ingredient in conjuring any magical cleaning concoction alongside vinegar and lemons. Are your sinks or drain clogged yet again? Indeed, it is a predicament to unclog these bad boys, so let us guide you on how to unclog them step by step. First, pour boiled water followed by a cup of baking soda into the affected places. Next, mix some warm water with vinegar to be added as well before pouring in more boiled water into your drains. This should do the trick to unclog your drains by now.
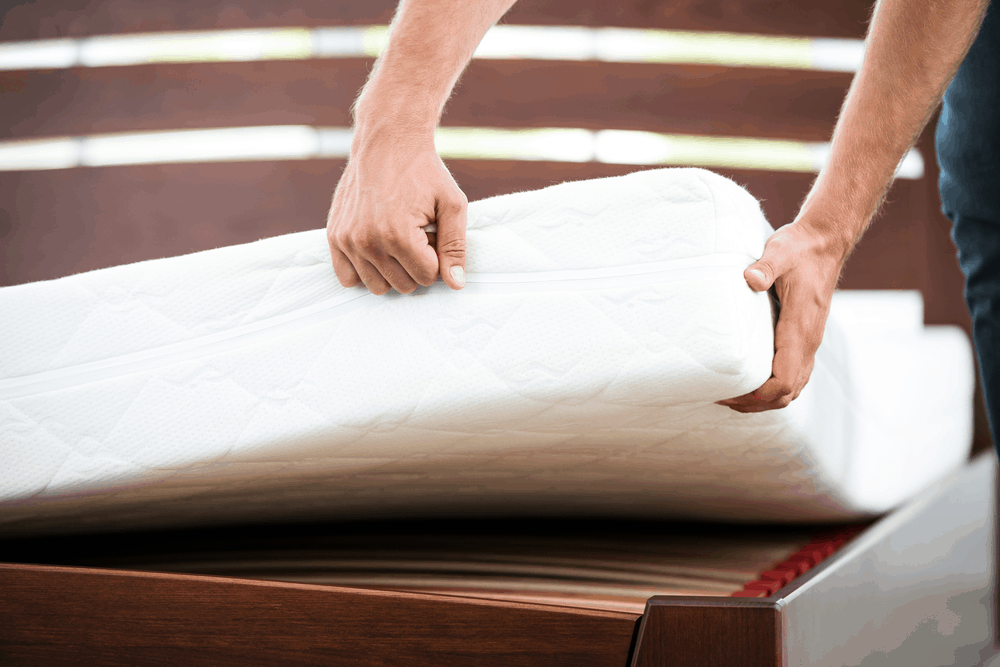
Versatility being its middle name, the baking soda lying around in your kitchen is also useful in keeping your mattresses fresh. Simply strip your mattress and cover it with huge amounts of baking soda to disinfect and remove odors. Leave it alone for a few hours while you tend to other cleaning jobs and vacuum the powder off your mattress when you’re done! Simple as that. Now, you can sleep soundly without worrying about having any bacteria or allergens becoming your sleep companion tonight.

Have you ever accidentally spilled the occasional drink on your plush ivory carpet? Or maybe dropped some food on that beloved carpet of yours by mistake when all you wanted to do was stay in for a peaceful night of movie marathon-ing and eating take-out dinners? And now, it’s months later and you haven’t figured out a way to get the unsightly stain off your carpet. Luckily, we have just the quick fix you need to save your carpet. Simply place a cloth soaked with water onto the stain and iron the spot out. With the heat from ironing, the stain would be broken up, making cleaning your carpet a more manageable task.
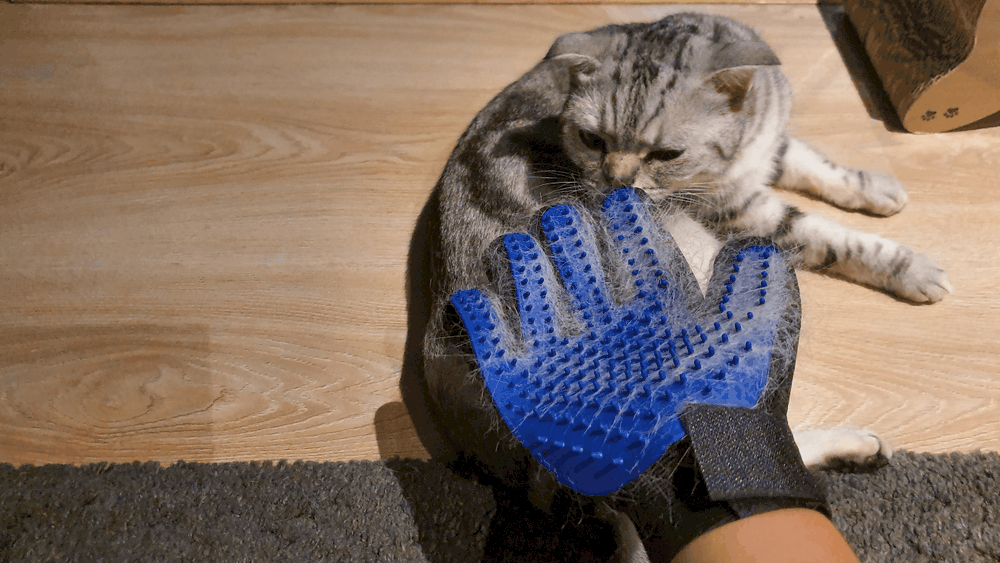
Women especially, are no stranger to this recurring problem of finding clumps of stray hair at the oddest of places in their homes and wondering how they get there in the first place. To make matters worse, if you have a pet cat or dog at home, the doubled amount of hair shed is enough to even form a floor mat. (Yes, it’s gross, we know.) So, what if you do not have a lint roller or vacuum handy at the moment? We doubt you’d be willing to bend and pick the strands of hair off your floors. So, simply grab any rubber gloves you can find and rub them across any surfaces covered with hair. You will find all the stray hairs sticking to your gloves in no time thanks to the electrical charge generated by rapid rubbing of your gloves against the floors. Having said that, we must admit that ultimately, the ideal solution would be to get yourself a smart robot vacuum to rid of the hassle of tackling this mess. There is a great selection of smart robot vacuums available that are packed with unique features specialized at targeting this problem. Simply grab yourself one and you can wave your dirty floors goodbye!

If you do not know by now, let us be the first to break it to you. Your dishwasher is meant for more than just your dishes! So, it’s time to utilize your dishwasher to the best of its ability by using it to clean other items ranging from your children's plastic toys to sponges. Compared to hand washing every single item in your house, this is undoubtedly the smarter and not to mention, time sparing method to keep your stuffs clean and sanitized. Simply stick the items that require cleaning into your dishwasher and leave them to be cleaned while you tend to other tasks.
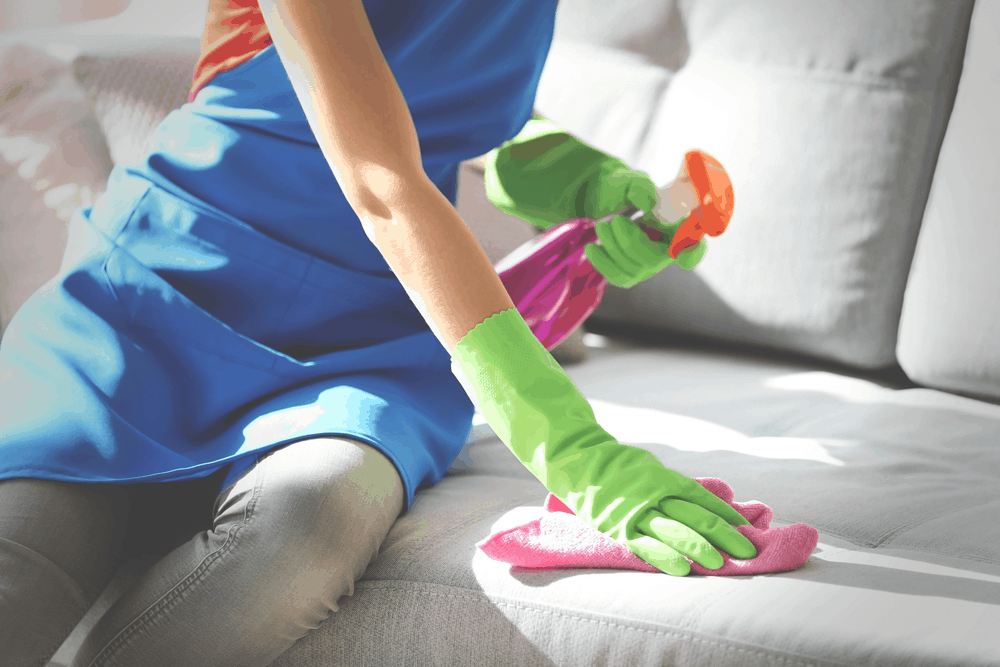
Has your microfiber couch been looking duller lately? Planning to replace it with a new couch? Well, give this trick a try before you go ahead with your decision. Simply spray some rubbing alcohol over your couch and wipe it clean with a cloth. Your couch should look brand new by now and better yet, the alcohol has also done you an extra favor by sanitizing all the surfaces it’s been on, leaving your couch germ-free.
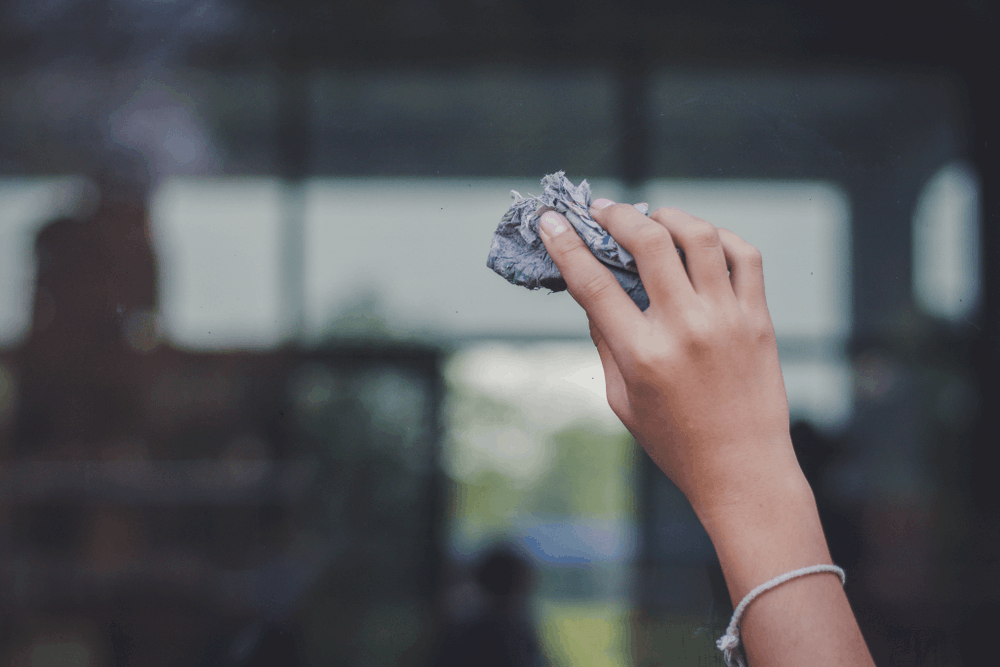
We are sure that you’re already familiar with this tip; heard from either distant relatives or friends who claim to be cleaning know-it-alls. Well, they are right to emphasize on this fact because unfortunately, many still have the misconception that using wet rags is the way to go about cleaning windows. Let us assure you that they have never been more wrong. Now, let us explain to you the science behind this gospel truth. You can’t escape from gathering oil stains on your windows no matter how frequent you clean them. And if you’re cleaning them wrongly, it would just cause your windows more harm than good. If these oily stains are cleaned with wet rags, they will leave behind unsightly streaks on your windows. Newspaper, on the other hand, can cut through and absorb grease easily, leaving you with a clearer view of the outside. Plus, you’re also doing a favor to your fellow Earth by reusing old newspapers for cleaning. While this tip may be as traditional as coming from your ancestors, we do have more unconventional tips up our sleeves to share with you. More on those later.
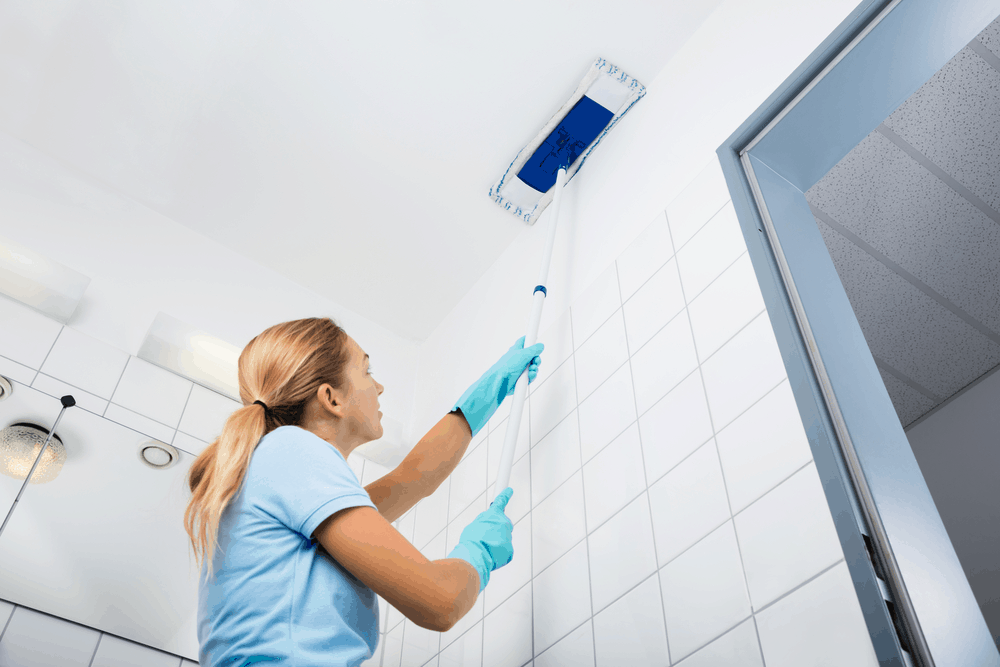
Places like deep corners and ceilings are notorious for collecting a disgustingly huge amount of cobwebs and dust. It could be because they are not cleaned frequently due to their less than ideal locations. Having trouble getting into these tricky corners or is your height hampering your cleaning efforts? Simply grab your nearest broom and secure a towel over the bristle end with a large rubber band. The broom’s length is extremely helpful in maneuvering difficult spots and the cloth attached is great at trapping dust and cobwebs. Despite this, if you are still facing difficulties, a stick vacuum would give you just the leverage you need and not to mention, great suction power so that not a speck of dust will be left behind once you are done.

While you may have paraded your children’s artworks to friends, families and even exhibits them on your refrigerator, we are sure that you’d be less than pleased if their masterpieces are portrayed on your precious walls. If your mischievous little ones have been using your walls as their canvases, try smearing some toothpaste onto a damp cloth to wipe them off. Be conservative with the amount of toothpaste you use as you wouldn’t want your walls ending up looking pasty. If all these tips have left you weary of starting your cleaning tasks, check out the last tip and hopefully it can help bring your cleaning groove back!

You saw that right. Say goodbye to the conventional mops you have lying around at home. Is this completely against everything you’ve known about cleaning since young? Probably. But, is it true? Most definitely. That one mop that you’ve used repeatedly since ages ago is causing more harm to your home than you can imagine. If we are being honest with ourselves, who has the time to thoroughly (and we mean, THOROUGHLY) wash their mops by hand and squeeze them dry strand by strand? No one, that’s who. As such, mops that are stored wet are excellent medias for growth of bacterial colonies. Instead of keeping your home clean, you would end up laying germs all over your floors. You wouldn’t want that, would you? So, it’s high time to toss that traditional mop of yours away in favor of a machine washable mop, or better yet, a mopping robot vacuum.
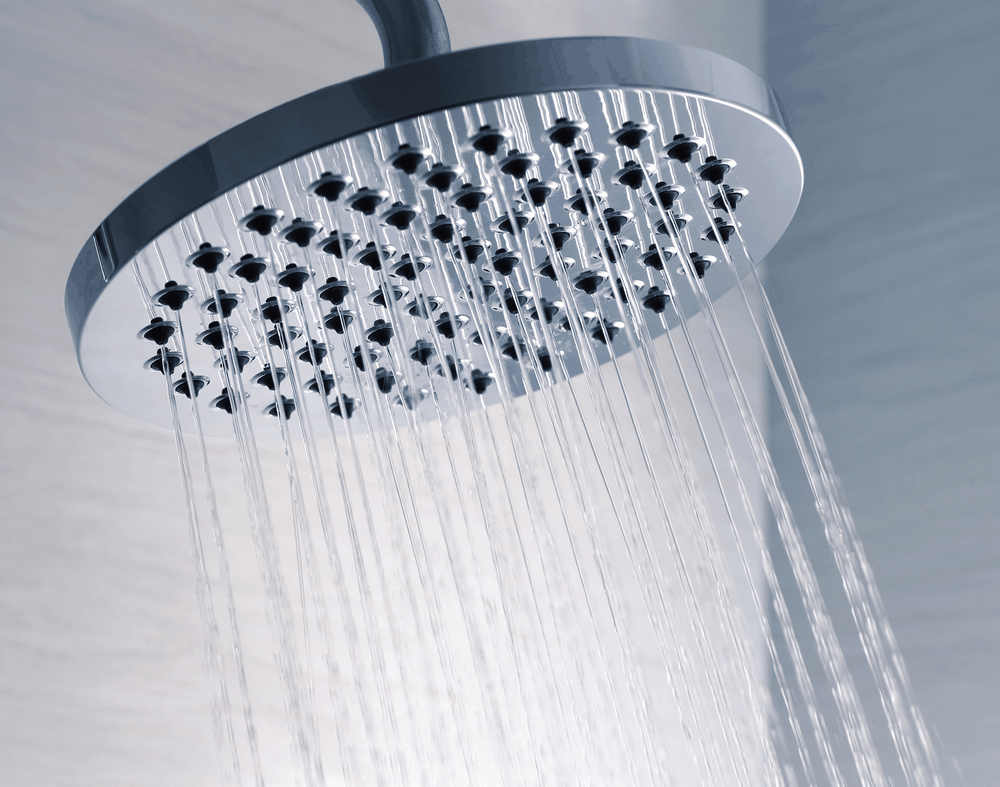
You are not the only one who needs a good, long soak in your bathtub to rid of the grimes of the day. Your spotty shower head deserves the same treatment as well. Based on researches conducted on shower heads, at least 20% of them are contaminated with germs. While this fact may gross you out, we have an extremely simple solution for you. First, fill a plastic bag with white vinegar and fix it to your shower head with rubber bands. All you need to do now is leave it to soak overnight and wait for the magic to happen. The acetic acid component within the white vinegar should do its job in killing off all the germs in your shower head. Now you can rest assure that all the showers you take will leave you cleaner than before.

Finally, the best part of cleaning! Yes, it’s time to give yourself a pat at the back for a job well done. Take a moment to just drink in all that you have accomplished today and do not hesitate to be proud of yourself. In fact, before starting with these much-dreaded chores, set yourself up for a nice reward afterwards just so you have something to motivate you along your way. It could be something as simple as going for a great meal or a movie to wind down. You’ve certainly earned it after working your hat off all day long.
And that’s it. We have laid out all our cleaning tricks for you and now it’s time for you to take action. You have already taken the first step into the right direction by checking out our article. All you have left to do now is pick any trick that calls out to you the most and carry it out today. What are you waiting for? The time to change is now.
What about you? Do you have any cleaning hacks up your sleeves? Feel free to share them in the comment section down below. If you have any further questions or would like to know more about these tips, just drop a comment below and we will be more than happy to help!